Solidium Inspections is pleased to announce that Tom McCabe is now credentialed as a Certified Master Inspector (CMI)® , which is the inspection industry’s top professional designation.

The Master Inspector Certification Board has awarded the Certified Master Inspector (CMI)® designation for demonstrating the highest level of competency by completing 1,000 fee-paid inspections and/or hours of inspection-related Continuing Education, for having been in the inspection business for at least three years, for abiding by the industry’s toughest Code of Ethics, and for agreeing to periodic background checks.

I want to thank his clients and colleagues for their continued support of Solidium Inspections.


Thermal Imaging

Thermal imaging is not a new thing, in fact we use it on every inspection to help us in identifying possible moisture, but it can be beneficial in many other circumstances.  It is not magic, and it cannot see through walls. There are certain conditions where it works and where it doesn’t work. It takes a trained and experienced inspector with the right tools to ascertain what the thermal images could mean. That’s why I recently obtained my Certified Residential Thermographer training and certification.

Certified Residential Thermographer Seal

In the following post, I will describe the benefits to a performing a dedicated thermal inspection or as an add-on service when purchasing your new home!

What is a thermal inspection?

Thermographic inspections measure surface temperatures by using infrared cameras. These cameras see light that is in the infrared, or heat, spectrum. The images created record the surface temperature variations of the objects in frame. The created images assist the inspector in identifying thermal abnormalities. These abnormalities are just that, abnormalities.  They can identify that something unusual is happening there but it cannot identify what is occurring. Without appropriate follow up inspection such as the use of a moisture meter, the thermal images only provide half the story. Further information can be found at the US Department of Energy’s site.

1. HIDDEN MOISTURE & MOLD

Having mold around the house is always unpleasant, and if it’s left unattended, it can quickly become a health hazard. However, mold cannot grow without moisture.  Thermal cameras are great tools to help identify potential moisture in walls and ceilings that would otherwise have gone unnoticed.  Remember, it needs to be followed up by using a moisture meter to confirm though. Once these locations are identified though, it becomes a lot easier to deal with this problem. Remove the mold and damaged building components, fix the source of moisture, dry the area out, clean and repair. Remember, this will only work if there is moisture that is at a different temperature than the surrounding building materials. I include a quick thermal scan on every inspection of the walls, ceiling and floors but a full thermal inspection is much more intensive.

2. ELECTRICAL HOTSPOTS

Over time, the electrical wiring system placed throughout the home could begin to deteriorate. Thermal imaging can help identify the locations of electrical hot spots and other anomalies, which if not corrected could lead to potential dangers. During a full thermal inspection, I will scan the interior of the electrical panel and all electrical receptacles and switches. The scan will show a thermographic anomaly (hot spot) on failing connections.  Absolutely no electrical connection should be hotter than the other components and wiring on that circuit. Again, this only identifies a potential problem and I will then recommend an electrician further assess the connection point or device.  Thermal scans are now required to be performed on many commercial electrical systems on a regular basis. If it’s required for commercial properties, then there is a clear need for this safety inspection and the government has now mandated it.

3. DETECTION OF VARIOUS STRUCTURAL DEFECTS

Walls, floors, ceilings, and roofs will all show a difference in temperature at certain areas due to thermal bridging, assuming an adequate thermal variance between the exterior and interior of the home.  A thermal anomaly could indicate that there may be a problem, such as damaged or missing structural components. For roofs, in particular, thermal imaging can show if there is moisture gathering at specific points, indicating that there is a leak somewhere on the roof. During a full thermal inspection, I will scan the exterior and interior of the home as well as the attic. Any anomalies may need further investigation but generally it’s pretty clear what the issue is.

4. ENERGY EFFICIENCY

As a homeowner, nobody likes paying too much for electricity or gas.  We should strive to make, and then keep, our homes as energy-efficient as possible. A thermal imaging inspection can help detect areas that could use improvement.  Normally, doorways and windows are the biggest sources of air infiltration and thermal imaging will help identify potential areas of improvement.  Additionally, a thermal scan can help identify areas of missing insulation by locating areas that the insulation is either not installed or not performing.  During a full thermal inspection, I will scan all walls, windows, doors and ceilings looking for anomalies.

5. PEST DETECTION

While this is much harder to detect with a thermal camera, it is possible to identify bees, rodents and even termites in walls or attics. Keep in mind, the thermal camera only looks for variations in heat, so the nest would need to be directly against an interior wall or ceiling and warm enough to conduct the heat into the drywall. This is the opposite of when the thermal imager is used to detect moisture but it still works!

I hope this helps explain what a thermal imager can do for you.  A sample thermal report can be found here:  https://reports.spectora.com/home-inspectors/my-inspection-company-7d056f8a70/sample_report?sample_id=25776

Please call us if you would like us to perform a full thermal imaging inspection for you!

Hello, Houston Homeowners!
In our beautiful, bustling Houston area, there’s a lot to love about owning a home. But there’s one tiny, uninvited guest that loves our homes as much as we do – termites! These little critters are a big deal in Texas, and especially on the gulf coast. Termites are every homeowner’s worst fear because they can cause significant unseen damage.  Subterranean termites, which are common in this area, can cause significant damage to the structure of your home if an infestation is not identified and eradicated quickly.
Why Houston Homes?
Our warm, humid climate is like a termite paradise. It’s great for backyard BBQs, but it also means termites are more active and potentially damaging. Regular inspections are key to keeping these pests in check. Repairing termite damage that has gone too far can be costly, inconvenient, and is quite extensive work that will require a professional.


What Happens During a Termite Inspection?
  • A Thorough Check: We look at every nook and cranny – from your attic to your foundation. Some of the visible signs include: termite wings around, or even worse, inside your home; mud tubes running up your foundation; and wet or deteriorated wood.
  • Identifying Trouble Spots: We pinpoint areas where termites might party – like damp spots or wood piles near your home.
  • Detailed Reporting: You’ll get a comprehensive report on our findings, complete with photos identifying the locations.  We also include areas that would be conducive to termites – even if we don’t see them.
Prevention is Better Than Cure:
Regular termite inspections are not just about finding termites; they’re about preventing them. We offer advice on keeping your home less appealing to these unwelcome guests.


Solidium’s Expertise:
With a Texas Professional Home Inspector License (#24101), a Mold Technician License (#1312) and a Termite Technician License (#0921549 operating under TPCL#783068)  and years of experience in the Houston area, we know exactly what to look for. Our team is trained to spot the earliest signs of termite activity, ensuring your home stays safe and sound.


Your Home, Our Commitment:
At Solidium Inspections, we’re not just inspecting homes; we’re protecting dreams. A termite-free home is a happy home, and we’re here to keep it that way.


Don’t Wait for the Crunch:
The sound of termites shouldn’t be the first sign you notice. Regular inspections are a small investment in the health and longevity of your home.
Ready to Schedule an Inspection?
Think it might be time for a termite inspection? Or just want to chat about how to protect your home? Reach out to us!

As the chill and rains of winter settle in here in the gulf coast region, it’s time to prepare your home for the cold and wet months ahead. Winterizing your home not only ensures your comfort but also helps you save on energy bills and prevents potential damage. In this blog post, we’ll guide you through essential tips to winterize your home and create a cozy haven during the frosty season.

Introduction

Winter is a time of hot cocoa, crackling fires, and snug blankets. But it’s also a season that demands special attention to protect your home from the harsh elements. By taking the necessary steps to winterize your home, you can ensure energy efficiency, maintain a warm and comfortable environment, and safeguard your property from potential hazards or damage.

Preparation Checklist

To winterize your home effectively, it’s crucial to pay attention to key areas. Here’s a checklist to guide you:

  • Insulation and Weatherstripping: Check for any gaps or drafts around windows, doors, and other openings. Seal them with weatherstripping or caulk to keep the cold air out and the warm air in. Be sure to pay attention to the caulking around the exterior window frames.With the wind driven rain we sometimes get, it’s a good idea to check that yearly.
  • HVAC System Maintenance: Have your heating system serviced by a professional HVAC technician to ensure optimal performance. Yearly maintenance is fairly cheap and can provide you some peace of mind if the weather turns bad. Clean or replace air filters regularly to improve air quality and energy efficiency.
  • Plumbing Protection: Prevent frozen pipes by insulating them and keeping the temperature above freezing. Disconnect outdoor hoses and cover exterior faucets. Don’t forget about the plumbing lines in any outdoor kitchens!
  • Roof and Gutter Maintenance: Clear debris from gutters to allow better rainwater drainage. Inspect your roof for damaged shingles or leaks from both the interior of your attic and at roof level. Address any issues promptly as neglect will only cost you more in the long run.
  • Safety Measures: Test smoke detectors and carbon monoxide detectors. Ensure fire extinguishers are accessible and in good working condition.
  • Know your house: Ensure you can access your main electrical disconnect, main gas shutoff and main water shutoff. You never know when you might need them and you don’t want to be searching for them when you do. If I previously did your home inspection, it is in the report.

Efficiency and Cost Savings

Winterizing your home not only keeps you cozy but also helps you save on energy bills. By implementing these measures, you can enjoy the following benefits:

  • Reduced Energy Consumption: Proper insulation and weatherstripping prevent heat loss, reducing the need for excessive heating.
  • Tax Incentives and Rebates: Some energy-efficient upgrades may qualify for tax incentives or rebates, allowing you to save even more.

Safety and Comfort

Winterizing your home also ensures a safe and comfortable environment for you and your family. Consider the following:

  • Preventing Frozen Pipes: Proper insulation and keeping the temperature above freezing help prevent pipes from freezing and bursting, saving you from costly water damage.
  • Warm and Cozy Indoor Environment: By sealing drafts and maintaining a consistent indoor temperature, you can create a cozy and comfortable space for winter hibernation.

Professional Home Inspection

While DIY winterization measures can go a long way, it’s always beneficial to schedule a professional to make an unbiased and experienced assessment. A qualified home inspector can assess your home’s unique needs and provide recommendations tailored to your property. While I will always recommend an HVAC technician perform maintenance, you may not need to hire a roofer, a plumber or a general contractor if there are only easy DIY fixes. We perform our annual maintenance inspection (for previous clients) for a flat fee of $300. While very similar to the previous full home inspections, it does lack some level of detail. We may not test every window, door, light or receptacle but we do focus on the major systems and those items that will keep your home healthy and safe.  You can schedule your Annual Maintenance Inspection here: https://www.solidiuminspections.com/request-an-inspection/

Conclusion

Winterizing your home is a vital step to protect your investment and create a warm and comfortable haven during the chilly and wet months. By following the essential tips outlined in this blog post, you’ll improve energy efficiency, enhance safety, and enjoy some cost savings. Don’t wait until the weather turns bad—take action now and winterize your home or schedule an annual maintenance inspection to ensure your home is ready to face winter’s embrace.

Owning a home is an exciting milestone, but it comes with its fair share of responsibilities. One aspect that often catches new homeowners off guard is the unexpected costs of home maintenance. Understanding these expenses is crucial for budgeting and avoiding any unpleasant surprises down the road. It’s hard enough to actually make a purchase in today’s market of rising home prices and interest rates but a new homeowner cannot afford to forget the costs of home maintenance. In this blog post, we’ll explore common home maintenance costs, additional unexpected expenses, and provide valuable tips to help reduce these costs.

Introduction

Before diving into specific costs, it’s essential to emphasize the importance of understanding home maintenance expenses. During my inspections, I talk about “regular maintenance” and “normal life expectancy” and in my reports I note items that you should “budget for replacement soon” but it’s easy to forget about this in the excitement of moving into your new home and making it your own.

I did it myself this year. I am normally pretty good at keeping a slush fund for unexpected repair costs but I had two air conditioners that unexpectedly needed replacement this year immediately after I had replaced my windows. I simply wasn’t ready for it and it made me think that I was lucky that I had some extra saving to at least defray some of the cost.

Based on the types of inspections over the past few months, there has been a noticeable shift to new home construction and I am seeing more first time buyers going that route.While new homes are generally much less costly to maintain, there are some costs that may be unexpected. Being aware of these costs allows new homeowners to plan their budgets effectively and be proactive in maintaining their homes – which saves money in the long term. Let’s explore some of the common home maintenance costs that may catch you by surprise.

Common Home Maintenance Costs

  1. Exterior Maintenance: This includes tasks such as painting, repairing or replacing siding, and keeping the exterior of your home in good condition. The exterior of your home is the first line of defense from the elements. If you do not take care of the little problems, they will become bigger issues that cost way more money to repair.
  2. HVAC Systems: Regular maintenance, filter replacements, and occasional repairs are necessary to keep your heating, ventilation, and air conditioning systems running efficiently. I say this to almost everyone, but regular checkups twice a year (AC & furnace) are crucial to keeping your system running optimally.
  3. Plumbing and water-related Issues: From leaky faucets to burst pipes, plumbing issues can arise unexpectedly and may require immediate attention. Twice a year I simply look at all my plumbing fixtures to make sure the toilets, sinks and drain piping are not leaking. I also routinely test my sprinkler system to make sure the rotors and sprayers are not busted.
  4. Electrical Systems: Electrical repairs, upgrades, and routine maintenance are critical for ensuring the safety and functionality of your home’s electrical systems. Routinely test the GFCIs in the home and if possible the AFCIs. But remember to turn off any sensitive electronics before testing these.
  5. Roofing and Gutters: Roof repairs, gutter cleaning, and periodic inspections are essential to protect your home from water damage and maintain its structural integrity. Once a year, you should get up on your roof, or have someone do it for you, and ensure there is no damage. Pro tip: Many roofing companies offer free inspections after heavy storms but understand that the salesperson (and yes, it’s a salesperson not a roofer) will attempt to sell you something.I would still suggest you verify the information provided.
  6. Appliance Repairs: Appliances like refrigerators, dishwashers, and washing machines may require repairs or replacements over time. Additionally, new appliances do not last as long as older appliances do. While it may be due to them being more complicated, with built in water, ice and filters, I simply think the manufacturers are skimping on quality.

Additional Unexpected Costs

In addition to the common maintenance expenses mentioned above, there are a few more routine costs that new homeowners should be prepared for:

  1. Pest Control: Dealing with pests like termites, rodents, or insects require professional intervention. I tell everyone to have the new home sprayed inside and out before you move in, then outside every quarter. While you can DIY this, why would you? Do you have the knowledge to tell the difference between an ant and a termite?
  2. Landscaping and Yard Maintenance: Keeping your lawn well-maintained, pruning trees, and landscaping add curb appeal but come with ongoing costs.
  3. Homeowners Association Fees: If you live in a neighborhood with a homeowners association, be prepared for monthly or annual fees to cover communal maintenance and amenities. You already know this number from closing on your home but have you actually budgeted for it?
  4. Insurance Premiums: Homeowner’s insurance is essential for protecting your investment but comes with recurring costs. Additionally, plan for annual increases. In the past year alone, insurance costs in the Houston area have gone up around 20%!

Tips to Reduce Maintenance Costs

While you can’t eliminate all maintenance costs, there are ways to minimize them. Consider the following tips:

  1. Regular Inspections and Maintenance: Schedule routine inspections and address any issues promptly to prevent them from becoming more significant problems.
  2. DIY vs. Hiring Professionals: Assess your skills and determine when it’s appropriate to tackle a maintenance task yourself or hire a professional. DIY projects can save money, but some tasks require expertise. I am a big DIYer but know my limits. Additionally, if you do it yourself and anything is wrong with it, your spouse will never forget. Trust me, I know. It’s easier to blame someone else.
  3. Proper Homeowner Insurance Coverage: Make sure you have adequate insurance coverage to protect your home and belongings in case of unexpected events. Make sure you understand the roof and wind damage clauses. They have changed drastically over the years.
  4. Energy Efficiency Upgrades: Invest in energy-efficient appliances, insulation, windows, and lighting to reduce utility bills and long-term maintenance costs. I just replaced my windows earlier this year, and can feel the difference.

Conclusion

Budgeting for home maintenance costs is an integral part of responsible homeownership. By understanding the common and unexpected expenses that may arise, new homeowners can be better prepared to take care of their homes. Remember, being proactive and regularly maintaining your home will not only save you money in the long run but also ensure that your investment remains in excellent condition.

Embrace the joys of homeownership while being mindful of the ongoing responsibilities. With proper planning and a little bit of knowledge, you can navigate the world of home maintenance with confidence. Happy homeownership!

When it comes to building your dream home, ensuring that every step of the construction process is executed correctly is crucial. One way to achieve this is through third-party pre-pour and pre-drywall inspections. These inspections play a vital role in verifying the structural integrity of your home and identifying potential issues before construction progresses further. In this blog post, we will explore the purpose, process, benefits, and common issues found during these inspections.

Purpose of Pre-Pour and Pre-Drywall Inspections

The primary purpose of pre-pour and pre-drywall inspections is to ensure that the construction aligns with the approved plans and specifications. If the plans are not on-site, then the standard building codes are used for reference. By conducting these inspections, potential issues or deviations from the original design can be detected early on, saving time, money, and potential headaches down the line.

Don’t get me wrong, most builders want to build the house for you the correct way but things are sometimes missed. The builder’s foreman, or construction supervisor, is the one responsible for ensuring the individual trades are performing their job in accordance with the approved plans and the building code but they are responsible for many houses and it’s easy for things to get missed. An independent third-party inspector works directly for you. We do not get paid by the builder so, to be honest, we don’t care what they think. It doesn’t matter to us if it costs the builder money to correct the issue. We document it and recommend it be corrected.

The Process of Pre-Pour and Pre-Drywall Inspections

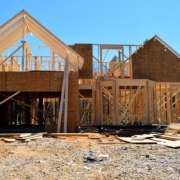
During the pre-pour inspection, a qualified inspector will evaluate the installation and condition of the foundation forms, beams, structural steel and/or post-tension cables, and the vapor retarder. Additionally, any rough-in plumbing, electrical and mechanical is inspected to ensure it is properly protected before the concrete is poured. This inspection ensures that everything is in place and meets the required standards and preferably, the on-site building plans.

On the other hand, the pre-drywall inspection occurs after the home is “dried-in” and any essential systems or components are in place but before the walls are closed up. This inspection allows the inspector to verify that the structure itself appears to be in accordance with the building plans or building codes as well as that the electrical wiring, plumbing, and other crucial components are installed correctly and safely.

Both inspections are typically conducted by a professional home inspector or a third-party inspector who possesses the necessary expertise to identify potential issues and the familiarity with building codes and regulations. While, these inspections are not “Code-inspections”, and cannot take the place of required city or township inspections, they do rely heavily on the building codes – which are the minimum construction standards required of every new home. These inspections are scheduled at specific stages of the construction process to catch any problems early and allow for timely corrections.

Benefits for Clients

Investing in pre-pour and pre-drywall inspections offers several valuable benefits for clients. Firstly, these inspections provide peace of mind. Knowing that your home is being thoroughly evaluated by a professional can alleviate any concerns and instill confidence in the construction process. Additionally, by identifying and rectifying issues early on, you can avoid costly repairs or renovations in the future. These inspections act as a proactive measure to ensure the longevity and quality of your home.

Common Issues Found during Inspections

Pre-pour and pre-drywall inspections often uncover common issues that, if left unnoticed, could lead to significant problems later on. By catching these issues early, they can be addressed promptly, saving you from potential headaches and additional expenses.

For example, during a pre-pour inspection, we identified a post tension cable snaking over and under adjacent plumbing drain lines while not being installed with the appropriate protection. Our concern was that, when tensioned, the cables could cause damage to the drain piping. This was noted in the report, but this builder did not listen and did not correct the issue. Within months, there was wastewater bubbling up in the adjacent shower drain. The builder had to jackhammer up the shower and concrete slab to replace a broken drain pipe. The builder never confirmed the cause, other than a broken drain pipe, but it was in the exact area where we noted the issue. We cannot be sure that if the issue was corrected in the beginning, none of this would’ve happened but, I don’t think it was a coincidence.

In a recent pre-drywall inspection, we noted that the majority of the anchor bolts had loosely installed nuts. This is what holds the walls securely to the foundation! While we could hope that the dry-wallers, who were coming the next day, would have noticed this and corrected it, I can guarantee that they would not have. Why would they even look? It’s not their job to do this, it was the framers job. Luckily, the builder’s representative was present and immediately made some phone calls to have it repaired before the issue was covered up.

Conclusion

Pre-pour and pre-drywall inspections are not just additional steps in the construction process; they are essential for ensuring your home is built to the highest standards. By verifying the installation and identifying potential issues early on, these inspections provide peace of mind, cost savings, and the avoidance of future problems. We encourage you to prioritize these inspections in your construction projects to protect your investment and create a home that stands the test of time.

Remember, building your dream home is not just about the final result; it’s about the journey. By investing in pre-pour and pre-drywall inspections, you are taking proactive steps to ensure the success and longevity of your home.

While most homeowners look for ways to cut expenses and lower the monthly bills, since we haven’t had any significant rain for over a month and many MUDs are asking us to limit our water usage. Here are some simple tips to help you save water at home.

Turn Off the Tap to Save Water at Home

When brushing your teeth, shaving, or washing your hands, turn off the tap until it’s needed. Use the water to dampen your skin or toothbrush, but then turn it off to brush your teeth or lather your hands. When it’s time to rinse, turn the water on again. If each person in your family practices turning off the tap, you can save over 20 gallons of water every day.  Additionally, dishwashers actually are very water conscious and use less water than if you washed the dishes by hand, so don’t be afraid to use it.

Ensure the Sprinkler System is not Wasting Water

Sprinkler systems are excellent tools to keep your lawn looking green and ensuring it get enough water but only when it’s operating correctly.  That’s one reason we include a free visual inspection of the system when we do our home inspections.  If it’s not working correctly, it can waste a large amount of water.  While you may get a littler wet, testing the system if extremely easy to do.  Most control panels have a “test system” option that allows you to run the zone for a few minutes while you inspect each sprinkler head or rotator. Don’t forget to watch the ground where the pipes most likely run, to see if you can pick up any underground leaks. A good indicator is a lack of pressure in some or all of the heads. If you think you have an issue, don’t worry about diagnosing the cause, just call a sprinkler repair person.  They have the tools and the knowledge to make it an easy fix.

Use a Rain Barrel

A rain barrel is a great way to repurpose the water that travels through your home’s guttering system. Install the rain barrel at the end of the downspout and use what’s collected to water your lawn and gardens. Rain barrels are inexpensive, easy to install, and will provide plenty of water for your landscape.  The hard part is distributing that water to your lawn.  The easy fix I have found is that you can use it on your flowerbeds and not to worry about the lawn. Let the sprinkler system do that but now it will use less water as it can skip the flowerbeds.

Repurpose Water in Your Home

To reduce your monthly bill, reuse water around the house. If you make pasta for dinner, save the water and use it for your indoor plants. You can also reserve water used for washing vegetables for the same purpose. While you’re waiting for your bath water to warm up, collect the cool water in a bucket. This water is useful for cleaning and for watering plants.

Take Shorter Showers

The average American showers for eight minutes every day. Use a stopwatch and pay attention to how much time you spend showering, then work to reduce this by a minute or two. For each minute you shower, you use approximately two gallons of water. Reducing your shower time by just two minutes can save over 20 gallons of water every week.

Save Water at Home: Repair Leaks

A dripping faucet wastes five gallons of water every day. In a month, this is 150 gallons of water that you’re paying for but not really using. A leaking toilet can use 200 gallons every day. This adds over $70 to your water bill each month.

If you’re uncertain whether the toilet is leaking, test it by dropping food coloring into the tank and waiting about 20 minutes. If the color appears in the toilet bowl, you have a leak. Repair plumbing problems to save water and lower utility bills.

Solidium Inspections provides home inspections to customers in Houston, TX, and the surrounding areas. Contact us to request our services.

Hurricane Season

Here in the Houston area, we know that it’s not a matter of if, but when, we will be hit with another significant hurricane or flooding event.  I have been lucky to have had no damage during any of the hurricanes, but my home did have water come over the slab during the tax day floods. There are some things you cannot prepare for but there are many things you can do to help minimize, if not prevent, any unnecessary damage to your home.

Here is a list of things you should handle prior to hurricane season.

Review your Insurance Policy

While not directly home related, this should be your first step. It is a good idea to review your insurance coverage to ensure it’s adequate. Many insurance policies are hard to understand, so don’t be afraid to call your provider and have a discussion. Make sure you’re protected from wind and water damage and you understand what those out-of-pocket costs could be. Many times, it can be pretty significant. Also, normal policies do NOT cover flooding events.  That is a different type of policy.  On a personal note, for the tax day flood that damaged our home, we had flood insurance when many of our neighbors did not. I saw them struggling to repair their homes while I (well, actually my wife) was deciding on what our newly remodeled home should look like.

Seal and Protect your Roof

High winds are the defining characteristic of hurricanes and your roof will be subject to extremely high winds along with the driving rain. Your roof is the first line of defense against the elements and it should be in the best possible shape before severe weather.  Inspect your roof for loose or damaged shingles or tiles. Ensure any flashings or flues are properly secured and well sealed.  Once water gets into an attic, it can cause significant damage. Prevention is the best protection.

Ensure your gutters are not clogged. Clogged gutters will not allow the water to be directed into the downspout and away from your home. The water will still drain somewhere.  It will most likely simply pool over the lip of the gutter and fall next to your home but it could flow behind the gutter and into your soffit and fascia board.

Additionally, don’t forget to look at the trees surrounding your home. Dead trees and branches should be removed.  Any tree limbs hanging over the roof or within 10’ of it should be trimmed back.

Seal and Protect your Exterior Walls, Windows and Doors

Those of you reading this who have worked with me know that I am a stickler when it comes to sealing up unwanted holes and seams in the exterior walls. While it may seem petty at the time (and usually ignored at the time of the inspection), those driving winds will push the rain into the wall, windows, doors and possibly your home. Once inside, it can cause serious damage that you may not notice for weeks.

Additionally, look around your yard for any object that could become a projectile. Patio furniture, grills, potted plants should be brought inside or secured.

Be prepared for a loss of Services

During severe weather, you may loss electricity, water or even gas service. Generators are an ideal solution for a loss of power, but adhere to any and all safety guidelines. Portable generators should be kept at least 10’ from any possible air intake into the home. That includes dryer vents. In my area, we hardly ever lose power, but I still have a potable battery backup system that we can use inside to keep some lights and the refrigerator going.

The biggest recommendation I can make is to think, plan and prepare ahead of time. For many of us, this is not the first hurricane season we have weathered (pun intended) but we should take these steps every year. There are many other things that you can do to prepare and additional information can be found your local county office of emergency management such as ReadyHarris.org.


If you have any questions or would like to discuss anything further please leave a comment or contact us directly.

Indoor air quality affects the well-being of everyone in your household. Here are 5 ways to improve indoor air quality in your home.

Change Air Filters to Improve Indoor Air Quality

Replacing the HVAC air filter on time is important not only to help the health of your system but to keep your indoor air clean. Once a filter becomes dirty and clogged, it sends dust and particles out of the vents and into your HVAC system and back into your home. It also slows down the air and causes your system to work harder.  While you should refer to the HVAC manufacturer’s manual to determine how often to change the filter, commonly the disposable filters you find in the ceilings or walls should be replaced every 30-90 days. Higher quality media filters can last up to 6 months.  This simple task only takes a few minutes but makes a world of difference for your indoor air quality.

Manage Humidity

As we all know, here in the Houston area, humidity is an issue. High humidity poses a threat to indoor air by encouraging mold to grow. Mold cannot grow unless there is moisture and that can include excessively high humidity. The ideal humidity inside a home is 30-50%. Here in the Houston area we are pretty lucky to maintain the indoor humidity at around 50%.  Use a hygrometer to monitor humidity levels and take action if they exceed 50%. The best ways to lower indoor humidity are through the use of a dehumidifier, ventilation fans, and the air conditioning system.

Many people don’t realize that the air conditioning system is called “air conditioning” and not “air cooling” because it actually “conditions” the air. It is designed to remove contaminants through the filtration as well as remove humidity through the cooling process. An efficiently operating HVAC system is crucial to managing humidity. Additionally, newer systems are designed much better than older ones in regards to airflow.  In my own house, I have a few rooms that simply don’t have enough airflow so I have installed portable dehumidifiers to help.

Houseplants Can Harm or Improve Indoor Air Quality

Certain species of plants have been proven to be air filters through scientific studies. Keeping some houseplants in your home can be beneficial for air quality if they are properly taken care of. Houseplants are detrimental to air quality when they are overwatered, causing mold to grow in the soil. If you choose to add houseplants to improve indoor air quality, learn about their care requirements and let the soil dry out between waterings. Excessive watering of houseplants can increase the home’s humidity as well so be careful.

Eliminate Dust Through Cleaning

While dust on the surfaces inside your home may not seem to affect the air, it actually does. If you see a dust layer on your furniture, it’s also in the air that you breathe. Dust and vacuum regularly to eliminate dust that pollutes indoor air.

Go Above and Beyond With Air Purifiers

The above tips for improving indoor air quality are relatively easy and affordable. If you are still having issues after trying these methods or want to go above and beyond, invest in HEPA air purifiers. These devices are especially useful for homes with pets or allergy sufferers. Read reviews before choosing your air purifiers, because they are a sizeable investment. While they are not too expensive to purchase, the cost adds up with the replacement filters. That is where the manufacturer makes its profit.

Here at Solidium Inspections, we are also licensed in mold assessment as well as indoor air quality. We provide home inspections to Houston, TX, and the surrounding areas. Contact us to request our services.

High humidity is uncomfortable indoors and outside. Humidity increases perspiration, worsens asthma symptoms, and creates an environment conducive to mold growth. Learn how to reduce humidity in the home to maintain safer and healthier living spaces.

Reasons to Reduce Humidity in the Home

Ideal indoor humidity levels are between 30-60%. Very high humidity causes your body temperature to rise. The body reacts by breathing faster and pumping less blood to your internal organs and brain. You might faint, suffer from heat exhaustion, or even experience heatstroke.
Failure to reduce humidity inside your home contributes to mold and mildew growth. Mold is dangerous as it triggers respiratory illnesses and allergy-like symptoms. Moisture in the air can also cause structural damage to your property including rotting wood, peeling paint, and damaged bricks, all of which may require costly repairs.

Ways to Reduce Humidity at Home

Indoor Plants

Although some houseplants add moisture to the air, especially when they’re overwatered, you can find indoor plants known for their dehumidifying properties. Peace lily tops the list of plants that help reduce humidity, plus it rids the air of some pollutants. Other natural dehumidifiers include Boston ferns, palms, orchids, spider plants, cactus, and English Ivy.

Proper Ventilation

Inadequate ventilation is the main cause of high humidity levels. Use ventilation fans properly, especially in areas that have excess moisture like the bathroom and kitchen, and you’ll reduce humidity in your home. When showering or cooking, open a window or use exhaust fans. In other areas of the house, a window fan can be used to increase air circulation.

Take Shorter or Cold Showers

If your home has high humidity levels, hot showers will make it worse. Take cooler showers or reduce the amount of time you spend bathing. If you choose to take a hot shower, open the bathroom window and turn on the fan to release the steam.

Proper Insulation Helps Reduce Humidity in the Home

If you have the budget for more expensive changes, invest in proper insulation to reduce humidity indoors. Although it can be costly, a properly insulated home will also lower your power bill by reducing the amount of power needed to heat and cool the home.

Keep Your Gutters Clean

Clogged gutters prevent water from being directed away from the foundation. As a result, water can leak into the basement or seep underneath the roofing shingles, causing algae and mold growth. Clean the guttering at least twice a year so that water is directed properly away from your home.

Solidium Inspections provides home inspections to customers in Houston, TX, and the surrounding areas. Contact us to request our services.